install blown-in insulation
Blown-in insulation is one of the most effective ways to improve your home’s energy efficiency. It helps maintain comfortable temperatures year-round by preventing heat loss in the winter and keeping your home cool in the summer. In this article, we’ll guide you through the process of install blown-in insulation in your attic, focusing on key steps and important tips. Blown-in insulation can be an affordable way to reduce energy costs and boost comfort.
What is Blown-In Insulation?
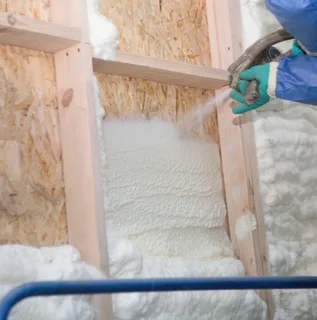
Blown-in insulation, also known as loose-fill insulation, consists of tiny particles of insulation material that are blown into spaces using specialized equipment. The material, usually made from cellulose, fiberglass, or mineral wool, fills gaps and small crevices in the attic, creating a tight thermal barrier. It’s ideal for attics, walls, and other hard-to-reach spaces in your home.
Why Choose Blown-In Insulation for Your Attic?
Blown-in insulation offers several benefits, making it a popular choice for homeowners in Sparks, Nevada, and surrounding areas. Here’s why it’s worth considering:
- Energy Efficiency: By filling gaps and sealing leaks, blown-in insulation helps reduce energy consumption. You’ll notice a decrease in your utility bills as your home maintains a more consistent indoor temperature.
- Quick Installation: Compared to other insulation methods, blown-in insulation is faster to install. The insulation material can easily be blown into tight corners and hard-to-reach areas in your attic.
- Eco-Friendly Options: Cellulose blown-in insulation is often made from recycled paper products, making it a more environmentally friendly option.
- Improved Comfort: Proper attic insulation ensures that your home stays warmer in the winter and cooler in the summer, creating a more comfortable living environment.
Prepping Your Attic for Insulation: A Step-by-Step Guide
Before you install blown-in insulation in your attic, it’s important to prepare the space properly. Skipping this step can affect the insulation’s performance and longevity.
1. Assess the Existing Insulation
First, check if your attic already has insulation. In many homes, attics have outdated or deteriorating insulation that needs to be replaced. If the old insulation is still in good shape, you may be able to add new blown-in insulation on top of it. Otherwise, consider removing it for a clean installation.
2. Seal Air Leaks
One of the primary goals of insulation is to stop air from escaping your home. Look for any cracks, gaps, or holes in the attic and seal them before adding insulation. Pay close attention to areas around pipes, ducts, and wires. Use caulk or spray foam to fill these gaps, ensuring a tighter seal.
3. Install Vent Baffles
Proper attic ventilation is crucial for preventing moisture buildup, which can damage your home and reduce insulation efficiency. Vent baffles, also known as rafter vents, ensure that air can flow freely through your attic while keeping the insulation from blocking the ventilation system. Install baffles between the rafters to maintain airflow while adding insulation.
The Blown-In Insulation Installation Process
Now that you’ve prepped your attic, it’s time to move on to the actual installation process. Here’s how to get the job done.
1. Choose the Right Insulation Material
There are three main types of blown-in insulation: cellulose, fiberglass, and mineral wool. Each has its benefits:
- Cellulose: Made from recycled materials, it’s an eco-friendly option with great thermal performance.
- Fiberglass: Lightweight and resistant to moisture, making it a popular choice for attics.
- Mineral Wool: Offers superior fire resistance and soundproofing capabilities.
Pick the material that best suits your home’s needs and climate conditions in areas like Sparks, Nevada.
2. Rent Blown-In Insulation Equipment
You’ll need a blower machine to distribute the insulation material evenly throughout your attic. These machines are usually available for rent at home improvement stores, and many retailers offer them at a reduced rate or even for free when you purchase insulation.
3. Measure and Mark the Desired Insulation Depth
Before starting, determine how much insulation you need by calculating the recommended R-value for your area. R-value measures the insulation’s ability to resist heat flow, and for most homes in Nevada, you’ll want an R-value of around R-38 to R-60. Use rulers or depth markers to ensure you apply the correct amount of insulation across the attic.
4. Begin Blowing the Insulation
With the blower machine in place, start blowing the insulation material into your attic. Begin at the farthest point from the attic entrance and work your way back, ensuring an even distribution across the entire space. Use slow, steady motions to avoid uneven layering.
Tips for Maintaining Your Attic Insulation
Once the insulation is installed, it’s important to maintain it to ensure long-lasting performance. Here are a few key maintenance tips:
- Check for Moisture: Insulation is highly susceptible to moisture damage. Regularly check your attic for leaks, especially during the rainy season, to prevent mold and mildew buildup.
- Inspect Your Insulation Annually: Over time, insulation can settle or get displaced. Inspect your attic insulation annually to see if it needs to be topped up or adjusted.
- Keep the Attic Ventilated: Ensure that your attic remains well-ventilated by checking vents and baffles periodically. Good airflow helps control moisture and extends the lifespan of your insulation.
FAQs About Blown-In Attic Insulation
Q: How much insulation do I need for my attic in Nevada?
A: In areas like Sparks, Nevada, the recommended R-value is typically between R-38 and R-60, depending on your home’s design and the local climate.
Q: Can I install blown-in insulation myself, or should I hire a professional?
A: Blown-in insulation can be a DIY project if you’re comfortable handling the blower machine. However, many people prefer hiring a professional to ensure proper installation, especially in larger or older homes.
Q: How long does blown-in insulation last?
A: Blown-in insulation can last 20 to 30 years or more with proper maintenance. However, environmental factors like moisture can reduce its lifespan, so regular inspections are important.
Q: What’s the cost of blown-in insulation in Sparks, Nevada?
A: The cost of blown-in insulation depends on factors like the type of material and the size of your attic. For an average attic, homeowners in Sparks can expect to pay between $1,000 and $3,000.
Q: Will blown-in insulation reduce noise?
A: Yes, in addition to improving energy efficiency, blown-in insulation can help soundproof your home by absorbing airborne noise.
Conclusion
Installing blown-in insulation in your attic is a smart investment in your home’s energy efficiency, comfort, and long-term savings. Whether you live in Sparks, Eureka, or Winnemucca, Nevada, this insulation method can be a cost-effective solution to keep your home comfortable year-round. If you’re ready to get started, call (775) 500-0024 for more information or to schedule your installation with Nevada Urethane today.


