Thinking about installing artificial grass in your garden but not sure where to start? You’re not alone. Laying artificial grass might sound like a job for the pros
Thinking about installing artificial grass in your garden but not sure where to start? You’re not alone. Laying artificial grass might sound like a job for the pros, but with the right guidance and a bit of patience, even beginners can achieve great results.
We’ll walk you through each step of the artificial grass installation process in Durham – from preparation to the final finish – in simple, beginner-friendly terms. Whether you want a mud-free play area for the kids, a pet-friendly lawn, or just a low-maintenance garden, this guide will help you get it done right.
What You’ll Need
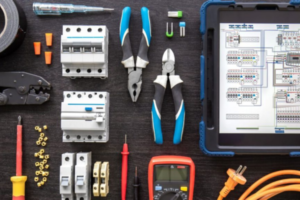
Before you get started, gather the following tools and materials:
Tools:
-
Turf cutter or spade
-
Rake and shovel
-
Wheelbarrow
-
Tape measure
-
Utility knife
-
Vibrating plate compactor (wacker plate)
-
Hammer or mallet
-
Stiff broom
Materials:
-
Artificial grass rolls
-
Weed membrane
-
MOT Type 1 hardcore (sub-base)
-
Sharp sand or granite dust
-
Joining tape and adhesive (if needed)
-
U-pins or turf pegs
-
Edging (timber or plastic, optional)
Step-by-Step Guide to Laying Artificial Grass
Step 1: Plan and Measure Your Area
Measure the total area you want to cover. This helps you calculate how much grass, membrane, and base materials you’ll need. Always order a little extra to allow for trimming and errors.
Step 2: Clear the Area
Remove all existing grass, plants, rocks, and topsoil to a depth of about 75mm to 100mm. You can use a turf cutter for large areas, or a spade for smaller spaces. Make sure to dig deep enough to create room for the sub-base.
Step 3: Lay the Weed Membrane
Once the area is cleared, roll out a weed control membrane over the soil. This prevents weeds from growing up through the artificial grass and helps maintain drainage.
Use pegs or nails to hold the membrane in place and trim off any excess around the edges.
Step 4: Build the Sub-Base
Add a layer of MOT Type 1 crushed stone or hardcore to around 50mm depth. This creates a strong and stable foundation. Spread it evenly and compact it using a vibrating plate.
Next, add a layer of sharp sand or granite dust (10–15mm). This provides a smooth surface and helps with drainage. Again, compact it thoroughly.
Tip: Make sure the base is level, but allow for a slight slope (1:100 gradient) to help water drain away from buildings.
Step 5: Roll Out the Artificial Grass
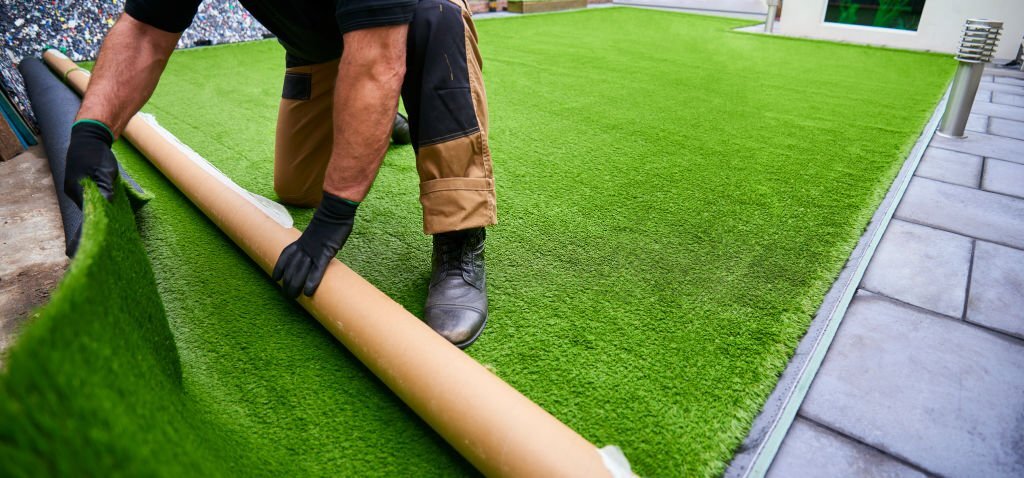
Now the fun part. Unroll your artificial grass and leave it to rest for a few hours. This allows any creases from packaging to flatten out.
Make sure the blades of grass are all facing the same direction – this gives the lawn a natural and consistent look.
Step 6: Cut and Join the Grass
Use a sharp utility knife to trim the grass around edges and obstacles like flower beds or patios. Cut from the back side to avoid damaging the blades.
If you need to join two pieces, overlap them slightly and cut through both layers for a clean edge. Use joining tape and adhesive underneath the seam and press down firmly.
Step 7: Secure the Edges
Use U-pins or turf pegs to pin down the edges of the grass. Space them about every 20cm for a secure fit.
If you’ve installed edging (like timber or composite boards), you can use nails or staples to secure the grass to the frame.
Step 8: Brush the Pile and Add Infill (Optional)
Use a stiff broom to brush against the direction of the grass blades. This lifts them up and gives the turf a fuller appearance.
If your grass requires infill (check with the manufacturer), apply kiln-dried sand evenly over the surface. This helps weigh it down, support the blades, and improve drainage.
Common Mistakes to Avoid
-
Skipping the sub-base: Laying grass on bare soil leads to bumps, water pooling, and short lifespan.
-
Poor drainage: Always check the gradient and soil conditions before installation.
-
Not compacting the layers: Loose base material causes sinking and an uneven surface.
-
Incorrect joining: Poorly joined seams will be visible and can lift over time.
-
Using the wrong tools: A plate compactor and sharp knife make the job much easier.
Final Thoughts
Laying artificial grass for the first time might feel intimidating, but with the right preparation and tools, it’s a very achievable DIY project. The key is to focus on the groundwork – compacting your base properly, ensuring drainage, and securing your turf well. Whether you’re creating a play space, pet area, or stylish garden retreat, artificial grass offers a durable and low-maintenance solution that looks fantastic all year round.
FAQs for First-Time Installers
Can I lay artificial grass directly on soil or grass?
No. It needs a proper sub-base for support and drainage. Laying directly on soil will cause sinking and weed issues.
How long does it take to lay artificial grass?
For beginners, a small garden (20–30m²) may take 2–3 days from start to finish, including base preparation.
Do I need to use sand infill?
Not always. Some modern artificial grass types don’t require infill, but it’s recommended for areas with heavy foot traffic or pets.
Can I lay artificial grass over concrete?
Yes, but it’s best to use a foam underlay for comfort and glue the turf securely to prevent movement.
Will weeds grow through artificial grass?
If you’ve used a quality weed membrane, weed growth should be minimal. Occasionally, you may see some around the edges.


