A freshly painted wall can look fine at noon. Then the late afternoon sun hits it from the side, and suddenly every seam, nail pop, and ridge shows. Many homeowners learn about drywall finishing this way, after the paint is already on.
Choosing a drywall finishing contractor Raleigh NC homeowners and business owners can rely on starts with knowing what good finishing involves. Hanging the boards is only half the job. The taping, mudding, sanding, and smoothing that follow decide whether a wall looks polished or patchy.
This article covers common finishing problems, what quality work looks like, how local conditions affect results, and how different projects call for different approaches.
Why Drywall Finishing Matters More Than Most People Think
Drywall installation gets the attention because it’s the visible, fast-moving part of a remodel. Walls go up in a day or two, and the room suddenly takes shape. Finishing is slower, quieter work, and it’s where most of the skill lives.
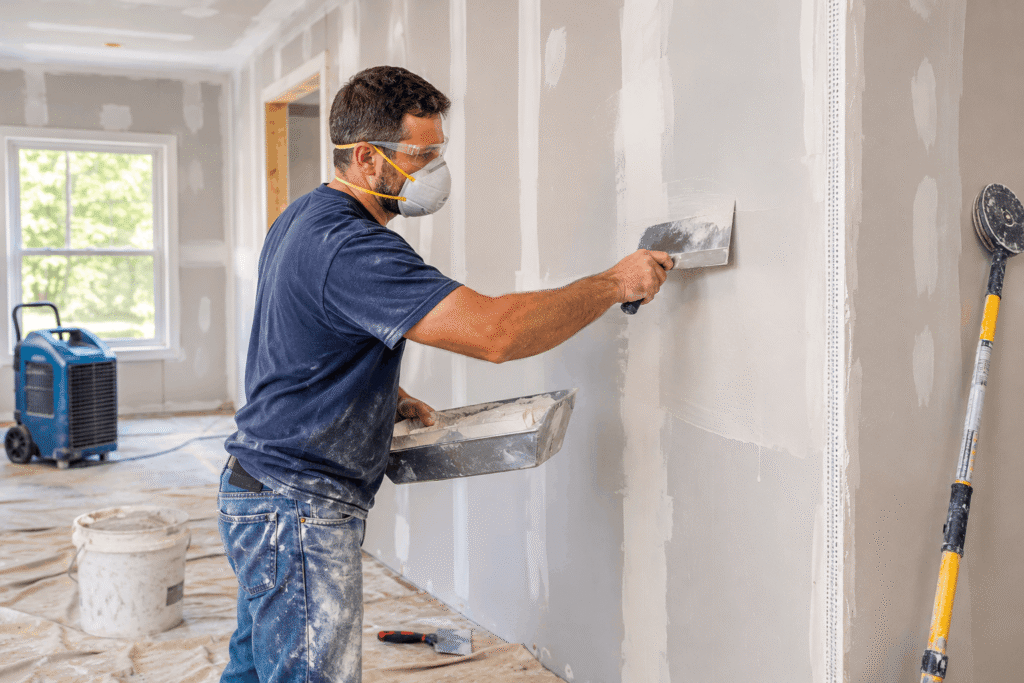
A finisher’s job is to make separate sheets of gypsum board look like one continuous surface. That means hiding seams, covering fasteners, building corners, and feathering compound so thin that no edge shows through paint.
When finishing is rushed, the problems rarely appear right away. They tend to show up weeks later, after the paint cures and the light changes.
Common Drywall Finishing Problems
Most finishing issues fall into a few familiar groups. Knowing them makes it easier to spot weak work and to ask better questions before a project starts.
Visible Seams and Ridges
Seams that show through paint usually mean the compound wasn’t feathered wide enough. A good finisher spreads each coat a bit wider than the last, so the joint blends into the flat board around it.
Raised ridges, sometimes called “crowning,” happen when too much mud builds up over a joint. They can be hard to see in a dim room but obvious under a window.
Nail Pops and Screw Pops
These small round bumps appear when a fastener pushes back through the compound. They’re often linked to framing lumber drying and shrinking, or to fasteners that weren’t set at the right depth during hanging.
Nail pops aren’t always the finisher’s fault. Still, an experienced finisher will notice poorly set fasteners and fix them before taping begins.
Cracking Along Joints and Corners
Cracks at inside corners or above doorways often point to movement in the structure. They can also come from tape that wasn’t bedded in enough compound, which leaves it loose underneath.
Paper tape, mesh tape, and setting-type compounds each behave differently. Picking the right one for each joint is part of the craft.
Bubbles, Blisters, and Peeling Tape
When tape bubbles or lifts, it usually wasn’t fully embedded in the first coat of mud. Air pockets stay trapped under the surface and push outward over time. This is one of the clearest signs of rushed drywall taping and mudding Raleigh homeowners may notice in older repairs or quick flips.
What Quality Finishing Actually Involves
Good finishing follows a predictable rhythm, even though it isn’t a rigid checklist. The finisher first embeds tape in compound over every seam. Then come several thin coats, each one wider and smoother than the last.
Drying time between coats matters a lot. Pushing ahead before the mud cures can trap moisture and lead to shrinking or cracking later.
Sanding comes last, and it calls for a light touch. Over-sanding can scuff the paper face of the drywall, which then shows up as fuzzy patches under paint.
Understanding Finish Levels
The drywall industry uses a scale of finish levels, from Level 0 (no finishing at all) to Level 5 (the smoothest result). Knowing these terms helps people talk clearly with any contractor.
Here’s a quick overview of the levels most homeowners will hear about:
- Level 3: Suited to surfaces that will get heavy texture, such as knockdown or orange peel.
- Level 4: The most common choice for flat or eggshell paint in homes.
- Level 5: Adds a thin skim coat over the entire surface. It’s often recommended for glossy paint, dark colors, or walls hit by strong side lighting.
If a room has big windows or recessed lights washing across the walls, it’s worth asking whether Level 5 makes sense. It costs more, but it hides flaws that Level 4 may not.
How Local Conditions Affect Drywall Work
Climate plays a bigger role in finishing than many people expect. Central North Carolina has hot, humid summers, and that moisture in the air slows how fast joint compound dries.
In July, a coat that might dry overnight in a drier climate can take noticeably longer. Finishers working in the Triangle often plan around this with fans, dehumidifiers, or setting-type compounds that cure by chemical reaction instead of air drying.
Seasonal swings also matter. Wood framing expands and contracts with humidity changes, which can stress joints in both new builds and older homes. A finisher who knows the area will often account for this when choosing tape and compound for corners and ceilings.
The region’s housing mix adds another layer. Newer subdivisions, mid-century ranch homes, and older houses with plaster walls each bring different finishing challenges.
Different Projects, Different Needs
Not every drywall job looks the same. The right approach depends on the size of the space, how it will be used, and what’s already there.
New Construction and Additions
In new builds and additions, finishers start from bare board. The main goal is consistency across large surfaces, especially in open-concept layouts where long walls catch light from several directions.
Remodels and Basement Finishing
Remodels often mean blending new drywall into existing walls. Matching an old texture or keeping a smooth transition between new and old surfaces takes patience and a practiced eye.
Repairs and Patches
Water damage, doorknob holes, and cracked ceilings are some of the most common repair calls. A small patch can be harder to hide than a full wall, because it has to disappear into a surface that’s already painted and textured.
Light Commercial Spaces
Offices, retail shops, and medical suites usually come with tighter schedules. Work may need to happen after hours, and finishes often must meet a specific level set by an architect or property manager.
Real-World Examples
Picture a family in North Raleigh turning an unfinished bonus room into a home office. The walls go up quickly, but the room has a large west-facing window. Under afternoon sun, a standard finish shows every seam. A Level 5 skim coat solves the problem before paint goes on.
Or think about a small dental office near downtown. The owner wants the remodel done without closing during business hours. Finishers work evenings, use quick-setting compound to keep things moving, and manage dust so patients never notice.
Another common case involves an older home with a ceiling crack that keeps coming back. Each time it gets covered with a thin coat of mud and paint, and each time it reappears. A finisher finally cuts out the loose tape, re-embeds new paper tape with setting compound, and the crack stays gone.
These situations show why experience counts. The same wall can need very different treatment depending on light, use, and the building’s history.
Benefits of Skilled Drywall Finishing
The most obvious benefit is appearance. Smooth, seamless walls make paint look richer and rooms feel more finished, whether it’s a living room or a waiting area.
Durability comes next. Properly embedded tape and well-cured compound hold up better against settling, temperature shifts, and everyday bumps. That means fewer callbacks and fewer touch-ups down the road.
Good finishing also saves money on painting. Walls with fewer flaws need less primer and fewer coats, and painters spend less time chasing problems.
For anyone planning to sell, wall quality affects first impressions. Buyers and inspectors notice cracks, pops, and uneven seams, even when they can’t name exactly what looks off.
What to Look for When Comparing Contractors
When people start searching for help, they’ll usually find a mix of large drywall companies, smaller specialty crews, and repair-focused businesses such as Very Handy Wall and Ceiling Repairs. Each type can fit different project sizes.
A few practical points help narrow the field:
- Ask about finish levels. A knowledgeable contractor can explain which level suits the room and the paint you plan to use.
- Look at past work in person or in photos taken under strong light. Flat, head-on photos hide flaws.
- Discuss drying time and scheduling. Rushed timelines are a common cause of finishing failures.
- Confirm licensing and insurance. North Carolina has licensing rules for contractors above certain project values, so it’s worth checking.
- Clarify cleanup and dust control. This matters most in lived-in homes and open businesses.
It also helps to ask how a contractor handles repairs versus full rooms. Some finishers excel at large new surfaces, while others are better at blending patches into existing walls.
Final Thoughts
Drywall finishing is where a wall’s final look is decided. Seams, corners, fasteners, and patches all depend on careful taping, patient coating, and smart choices about compound and finish level.
Local humidity, building age, and project type all shape how the work should be done. Understanding these factors makes it easier to talk with contractors, compare quotes fairly, and set realistic expectations.
Before your next project, walk through the space at different times of day. Note where light hits the walls, and bring those observations to your first conversation with a finisher. It’s a simple step that leads to better results.
FAQs
How long does drywall taping and mudding usually take?
A typical room often takes three to five days, since each coat needs time to dry before the next. Humid weather or large spaces can stretch that timeline, while quick-setting compounds can shorten it.
What is the difference between Level 4 and Level 5 drywall finish?
Level 4 includes taping and several coats over joints and fasteners, which works well for flat paint. Level 5 adds a skim coat over the entire surface, creating a more uniform finish for glossy paint or strong lighting.
Why do nail pops keep appearing on my walls?
Nail pops often come from framing lumber shrinking as it dries or from fasteners that weren’t set properly. Re-securing the board with a screw nearby and refinishing the spot usually fixes the problem.
Can drywall cracks be fixed without replacing the board?
Most cracks can be repaired by removing loose tape, applying new tape, and refinishing with fresh compound. Replacement is usually only needed when the board itself is water-damaged, crumbling, or badly broken.