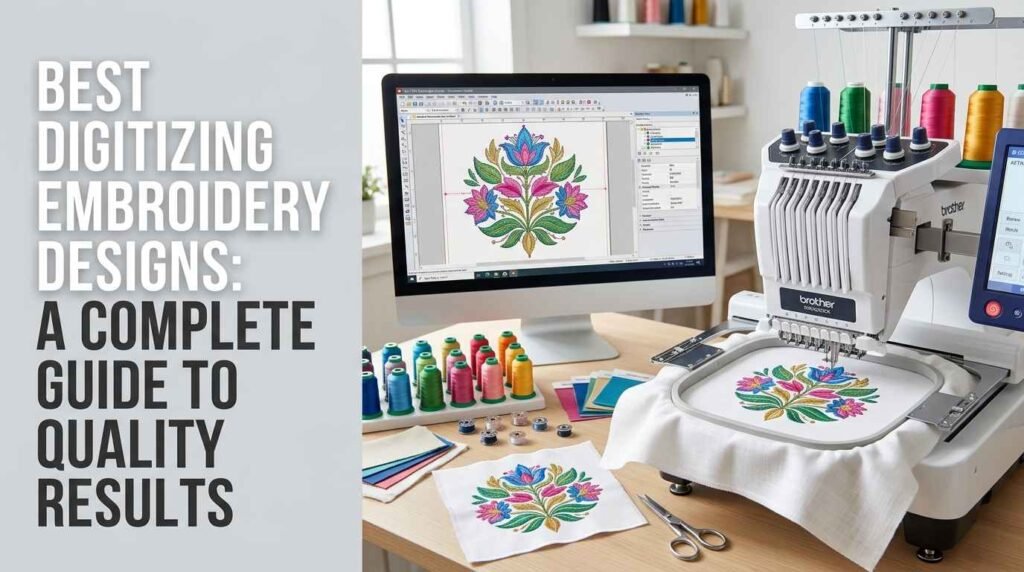
Best Digitizing Embroidery Designs A Complete Guide to Quality Results
Creating high-quality machine embroidery requires more than attractive artwork. A design must be converted into suitable stitch instructions so an embroidery machine can reproduce its shapes, lettering, and colors accurately. This process is known as embroidery digitizing, and its quality can directly affect the appearance, durability, and consistency of the finished product.
The best digitizing embroidery designs are prepared with attention to stitch types, density, underlay, stitch direction, fabric characteristics, and design dimensions. These details help determine whether a logo looks clear on a polo shirt, a decorative pattern works on a jacket, or a custom design remains readable on a cap.
Whether you are new to machine embroidery or manage an embroidery business, understanding what makes a digitized design reliable can help you avoid common stitching problems and make better decisions when preparing artwork for production.
This guide explains how embroidery digitizing works, what to look for in a quality design, which factors affect stitch results, and how to evaluate an embroidery file before using it.
What Are Digitizing Embroidery Designs?
Digitizing embroidery designs are digital files created by converting artwork into machine-readable stitch instructions. These instructions tell the embroidery machine how to form the design using thread.
An ordinary image file, such as PNG or JPG, displays artwork but generally does not contain the stitch information required by an embroidery machine. Digitizing translates the visual elements into a planned sequence of stitches, including their types, directions, spacing, and order.
For example, a company logo may contain lettering, outlines, and several colored shapes. During digitizing, each part must be assigned a suitable stitch structure so the machine can reproduce the design on the intended material.
Common embroidery file formats include DST, PES, JEF, EXP, HUS, and VP3. The correct format depends on the embroidery machine and software being used.
A file is not automatically high quality simply because it opens successfully. Its stitch construction, dimensions, and compatibility with the fabric must also be considered.
What Makes the Best Digitizing Embroidery Designs?
A reliable embroidery file balances visual accuracy with the practical requirements of machine stitching. Several factors contribute to this balance.
1. Accurate Stitch Types
Different parts of a design require different stitch types. Running stitches are often used for fine outlines, satin stitches for lettering and narrow shapes, and fill stitches for larger areas.
Choosing an unsuitable stitch type can affect coverage, texture, and durability. For example, a large shape may not be suitable for a very wide satin column, while a narrow outline may not need a dense fill.
Professional digitizing assigns stitch types according to the shape, size, fabric, and intended appearance of each element.
2. Balanced Stitch Density
Stitch density refers to how closely stitches are placed within an embroidered area. Appropriate density helps provide coverage without adding unnecessary thread.
Excessive density may create stiff embroidery, fabric puckering, thread breaks, or needle-related problems. Insufficient density may leave gaps or expose the underlying material.
The correct setting depends on the design, thread, stitch type, fabric, and dimensions. A pattern intended for lightweight cotton may need different settings from one used on denim or a thick jacket.
3. Suitable Underlay Stitches
Underlay consists of foundational stitches placed beneath the visible top stitches. It can support the fabric, improve coverage, and help stabilize certain design elements.
The type and amount of underlay depend on the shape and material. Satin lettering, large fill areas, and narrow outlines may require different approaches.
Too little underlay can contribute to inconsistent coverage, while excessive underlay can make the design unnecessarily bulky. A well-prepared file uses underlay where it supports the intended result.
4. Proper Stitch Direction
Stitch direction influences the texture and visual appearance of embroidery. Changing the direction of stitches can help define shapes, create texture, and manage how the design interacts with the fabric.
Poorly planned stitch direction may contribute to uneven coverage or an inconsistent finish. The digitizer should consider the shape of each element and how the stitches will look when viewed together.
5. Appropriate Pull Compensation
During stitching, thread can pull fabric inward and change the apparent dimensions of certain shapes. This may create gaps between adjoining elements or cause lettering to appear narrower than expected.
Pull compensation adjusts the design to account for this movement. The required adjustment depends on the material, stitch type, density, and design size.
Suitable compensation can improve shape accuracy, but excessive adjustment may distort the design. Testing on the intended fabric helps confirm whether the settings are appropriate.
Different Types of Digitizing Embroidery Designs
The right digitizing approach depends on the type of artwork and the product being embroidered.
Logo Embroidery Designs
Logo digitizing is commonly used for uniforms, company apparel, promotional products, and branded merchandise. The design must preserve recognizable shapes, lettering, and color relationships.
Small text and thin outlines require particular attention because they may become difficult to reproduce at compact sizes. A logo designed for a large jacket back may need a different version for a small chest placement.
Cap and Hat Embroidery Designs
Cap embroidery involves stitching on a curved surface with limited space. Design size, placement, stitch sequence, and lettering readability are especially important.
A design digitized for a flat garment may need adjustments before it can be used on a cap. The file should account for the cap’s shape and any restrictions caused by seams or thick areas.
Jacket and Large-Back Designs
Jacket designs can include larger artwork, detailed lettering, and extensive filled areas. Because these designs may contain many stitches, planning the density and sequence is important.
The digitizer should consider the jacket material, available embroidery area, and the effect of dense stitching on flexibility and comfort.
Appliqué Embroidery Designs
Appliqué uses pieces of fabric as part of the finished design, with embroidery stitches securing or outlining those pieces. The digitizing file needs appropriate placement, tack-down, and finishing instructions.
The sequence must be suitable for the production workflow, including any steps where the operator positions or trims the appliqué material.
Decorative and Floral Embroidery Designs
Decorative patterns may contain curved shapes, small details, overlapping elements, and multiple stitch directions. Their success depends on how well the digitizer balances detail with the limitations of thread and fabric.
Simplifying unnecessary details can help improve the appearance of a design, particularly when it must be stitched at a smaller size.
How Fabric Affects Embroidery Digitizing Quality
Fabric selection influences how a design should be prepared. Different materials stretch, compress, and support stitches in different ways.
Cotton and Polo Shirts
Lightweight cotton and polo fabrics may pucker when a design contains excessive stitching or insufficient stabilization. Suitable stitch density and stabilizer support can help maintain the fabric’s shape.
Small logos should be designed with readable lettering and controlled coverage, particularly when the garment is thin.
Denim and Heavy Materials
Denim and heavyweight fabrics can support many detailed designs, but excessive stitching may still create stiff areas. Thick seams and folded sections may also affect needle penetration.
The design should be planned for the available space and the material’s thickness.
Towels and Fleece
Raised fibers can hide fine details and small lettering. Clear shapes, suitable stitch coverage, and an appropriate topping may help keep the embroidery visible.
Adding more stitches is not always the best solution because excessive density can increase bulk.
Stretch Fabrics
Stretchy fabrics may move during stitching and distort after they are removed from the hoop. Suitable stabilization, careful hooping, and fabric-specific digitizing can help manage this movement.
Testing is particularly important for garments that must retain their flexibility.
How to Choose the Right Embroidery Digitizing Service
Selecting a digitizing provider involves more than comparing prices. The quality of the file and the provider’s ability to understand the intended application can affect the final result.
Review Relevant Samples
Look for examples involving designs similar to your project. A provider experienced with small logos may approach a large jacket design differently from someone specializing in decorative patterns.
If possible, review actual stitched samples rather than relying entirely on digital previews.
Provide Clear Artwork
Supply the best available version of the artwork. Vector files such as SVG and EPS can be useful, while clear PNG or JPG images may also work as references.
If the image contains blurry details or a complicated background, additional cleanup may be necessary before digitizing.
Explain the Intended Use
Tell the provider where the design will be stitched, what material will be used, and the required width and height. Also specify the embroidery machine’s required file format.
This information helps the digitizer make decisions based on the actual project rather than the artwork alone.
Ask About Revisions and Testing
Find out whether revisions are available if the file has a problem. Ask what information is needed to troubleshoot stitching issues and whether the provider can adjust the design for a different fabric or placement.
A clear revision process can make production easier when the first sample reveals an issue.
Common Problems With Digitizing Embroidery Designs
Even a visually attractive design can produce poor results if the stitch plan is unsuitable for the material or intended size.
Fabric Puckering
Puckering may result from excessive density, poor hooping, inadequate stabilization, or incorrect tension. Review the file and machine setup before changing the design.
Thread Breaks
Thread breaks can result from needle damage, tension problems, poor thread quality, machine maintenance issues, or dense stitch construction. Repeated breaks in the same design area may indicate that the file needs review.
Uneven Coverage
Gaps may appear when density or stitch construction does not provide sufficient coverage. Fabric movement and unsuitable stabilization can also contribute.
Unreadable Lettering
Small text, narrow gaps, and thin fonts can become difficult to reproduce. Increasing the lettering size or simplifying the design may improve readability.
Excessive Stitch Count
An unnecessarily high stitch count can increase thread consumption and production time. It may also create stiff embroidery without improving visual quality.
A skilled digitizer looks for ways to maintain suitable coverage while avoiding unnecessary stitches.
How to Check an Embroidery File Before Production
Before stitching a finished product, review the file in compatible embroidery software and confirm that it fits the intended embroidery area.
Check the dimensions, stitch count, color sequence, and overall design layout. Look for unusually dense sections, unnecessary jumps, or elements that appear out of place.
Next, run a test stitch on fabric similar to the final material. Inspect the finished sample for gaps, puckering, distorted lettering, loose threads, and uneven coverage.
If the sample has a problem, determine whether the cause is the file or the embroidery setup. The needle, stabilizer, thread tension, hooping, and machine condition can all affect the outcome.
For bulk orders, testing before production can help reduce wasted garments and avoid repeating the same problem across multiple items.
Conclusion
The best digitizing embroidery designs combine accurate stitch construction, balanced density, suitable underlay, proper stitch direction, and adjustments for the intended fabric. These factors help maintain clear details, consistent coverage, and reliable machine performance.
Choosing the right digitizing approach also depends on the design type, dimensions, garment placement, and embroidery machine. Reviewing the file and testing it on the intended material are important steps before starting production.
For custom logos, apparel, caps, jackets, and decorative projects, ZDigitizing can help prepare artwork as embroidery-ready files suited to the intended application.
Frequently Asked Questions
Q1. What are digitizing embroidery designs?
Digitizing embroidery designs are digital files containing stitch instructions that guide an embroidery machine in reproducing artwork with thread.
Q2. What makes an embroidery digitizing file high quality?
A quality file uses suitable stitch types, density, underlay, direction, sequence, and dimensions for the intended fabric and design. It should also be compatible with the embroidery machine.
Q3. Which file formats are commonly used for machine embroidery?
Common formats include DST, PES, JEF, EXP, HUS, and VP3. The required format depends on the embroidery machine and software.
Q4. Can one digitized design work on every fabric?
Not always. Different fabrics respond differently to stitching, so the design may need adjustments to density, underlay, stabilization, or construction.
Q5. Why is stitch density important in embroidery digitizing?
Stitch density affects coverage, texture, flexibility, and thread consumption. Excessive density may cause stiffness or puckering, while low density can leave visible gaps.
Q6. How can I check whether an embroidery file is ready for production?
Review the file in compatible software, confirm its dimensions and color sequence, and run a test stitch on the intended material. Inspect the sample for coverage, alignment, and readability.
Q7. Is professional embroidery digitizing suitable for company logos?
Yes. Professional digitizing can help prepare company logos for machine stitching, with attention to lettering, shapes, colors, design size, and fabric compatibility.