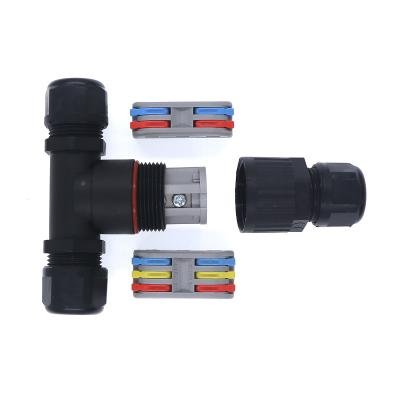
Reliable electrical connections are essential in environments where moisture, dust, vibration, and extreme temperatures can affect performance. Whether used in marine equipment, industrial machinery, automotive systems, or outdoor lighting, watertight connectors provide dependable protection against environmental damage. Proper installation plays a major role in ensuring these connectors perform as intended and maintain long-term reliability.
This guide explains the best practices for installing 2-5 Pin Watertight Connectors, helping technicians, engineers, and DIY users achieve secure, durable, and efficient electrical connections.
Understand the Application Requirements
Before beginning any installation, identify the specific requirements of your project. Different electrical systems demand varying voltage ratings, current capacities, and environmental protection levels.
Consider factors such as:
- Operating voltage and current
- Exposure to water or humidity
- Temperature fluctuations
- Chemical exposure
- Mechanical vibration
- Indoor or outdoor installation
Selecting a connector that matches these conditions reduces the risk of failure and extends the lifespan of the electrical system.
Choose the Correct Connector Size
Watertight connectors come in multiple configurations designed for different wiring needs. The number of pins should correspond to the electrical circuits that need to be connected.
Choosing the right 2-5 Pin Watertight Connectors reduces unnecessary wiring complexity while ensuring every circuit remains properly isolated. Always verify compatibility with the cable diameter, conductor size, and equipment specifications before installation.
Inspect Components Before Installation
Even high-quality connectors should be inspected before use.
Check for:
- Damaged seals
- Bent terminals
- Cracked housings
- Manufacturing defects
- Dirt or debris inside the connector
A damaged seal or terminal can compromise waterproof performance and lead to corrosion over time.
If any component appears defective, replace it rather than attempting repairs.
Prepare the Cable Carefully
Proper cable preparation is one of the most important steps during installation.
Use professional wire-stripping tools to remove insulation without damaging the conductor strands. Excessive stripping leaves exposed wire, while insufficient stripping may create poor electrical contact.
Ensure:
- Conductors remain clean
- No copper strands are broken
- Cable insulation remains intact
- Wire length matches connector specifications
Taking extra care during cable preparation improves conductivity and mechanical strength.
Use Proper Crimping Tools
Many installation failures result from improper crimping.
Always use the manufacturer-recommended crimping tool designed for the connector terminals. Incorrect tools may create weak crimps that increase resistance or cause intermittent electrical faults.
A proper crimp should:
- Hold the wire securely
- Maintain conductor integrity
- Provide consistent electrical conductivity
- Resist vibration and pull forces
Avoid using pliers or improvised tools that cannot produce uniform crimps.
Ensure Proper Seal Placement
Waterproof performance depends heavily on correct seal installation.
Rubber gaskets and sealing rings must be positioned exactly as specified by the manufacturer. Misaligned seals can allow moisture to enter even if the connector appears fully assembled.
When installing 2-5 Pin Watertight Connectors, double-check that:
- O-rings sit evenly
- Cable seals fit tightly
- Locking nuts compress seals correctly
- No seal is twisted or pinched
Proper sealing protects internal contacts from corrosion and electrical failure.
Avoid Excessive Cable Stress
Cables should never pull directly against connector terminals.
During installation, leave enough slack to accommodate movement, vibration, and thermal expansion. Strain relief features should support the cable instead of allowing mechanical force to reach the electrical contacts.
Good cable routing also prevents:
- Sharp bends
- Twisting
- Abrasion
- Excessive tension
Using cable clamps and protective sleeves further enhances durability.
Verify Correct Pin Assignment
Incorrect wiring can damage sensitive electronic equipment.
Before inserting terminals into the connector housing, carefully verify the wiring diagram. Label wires if necessary to prevent mistakes during assembly.
After insertion, confirm that each terminal locks securely into position.
Testing continuity before energizing the system helps identify wiring errors early.
Protect Against Contamination
Although watertight connectors are designed for harsh environments, contamination during installation can reduce effectiveness.
Keep connectors away from:
- Dust
- Metal shavings
- Sand
- Oil
- Grease
- Moisture
If contamination occurs, clean components using approved electrical contact cleaners before assembly.
Never force dirty connectors together, as debris may damage sealing surfaces.
Tighten Locking Mechanisms Correctly
Many waterproof connectors include threaded locking rings or bayonet locking systems.
Follow the manufacturer’s recommended torque specifications instead of overtightening.
Excessive force may:
- Damage threads
- Deform seals
- Crack housings
- Reduce waterproof performance
Under-tightening can also allow connectors to loosen during vibration.
A balanced tightening force ensures maximum protection.
Perform Electrical Testing
After installation, conduct basic electrical tests before placing the system into service.
Recommended tests include:
- Continuity testing
- Insulation resistance
- Voltage verification
- Load testing
These tests confirm proper assembly and identify installation errors before they become costly failures.
Testing should always follow applicable electrical safety procedures.
Conduct Waterproof Inspection
For systems exposed to rain, wash-down conditions, or underwater environments, verify sealing performance after installation.
Inspect for:
- Proper gasket compression
- Secure locking
- Visible gaps
- Damaged cable jackets
Some industrial applications may also require pressure or immersion testing according to industry standards.
Routine inspections ensure long-term reliability.
Schedule Regular Maintenance
Even well-installed connectors benefit from periodic inspection.
Maintenance should include:
- Cleaning external surfaces
- Checking locking mechanisms
- Inspecting cable strain relief
- Looking for corrosion
- Verifying electrical continuity
Replacing worn seals before they fail helps prevent unexpected downtime.
For installations using 2-5 Pin Watertight Connectors in demanding environments, preventive maintenance significantly extends service life.
Common Installation Mistakes to Avoid
Several avoidable mistakes reduce connector performance and reliability.
These include:
- Using incorrect wire gauges
- Damaging insulation while stripping
- Poor crimp quality
- Incorrect pin assignments
- Missing sealing components
- Overtightening locking rings
- Installing contaminated connectors
- Ignoring manufacturer instructions
Avoiding these errors minimizes future maintenance costs and improves overall system performance.
Why Proper Installation Matters
Correct installation provides benefits beyond waterproof protection.
A properly assembled connection offers:
- Improved electrical conductivity
- Reduced signal loss
- Longer equipment lifespan
- Lower maintenance requirements
- Better vibration resistance
- Enhanced operational safety
These advantages are especially valuable in transportation, renewable energy, industrial automation, telecommunications, and marine applications where equipment reliability is critical.
Final Thoughts
Successful installation requires careful planning, proper tools, and attention to detail. From selecting compatible components to verifying wiring and maintaining effective seals, every step contributes to long-term reliability.
By following these best practices, installers can maximize the performance and durability of 2-5 Pin Watertight Connectors while reducing the likelihood of electrical failures caused by moisture, vibration, or improper assembly. Investing time in correct installation today ensures dependable operation and lower maintenance costs throughout the life of the electrical system.