Build Your Own Motherboard Kit
In the ever-evolving world of computing, enthusiasts and tech-savvy individuals are always looking for new ways to push boundaries. One of the latest trends capturing attention is the build your own motherboard kit. This DIY approach allows hobbyists, students, and professionals to design, assemble, and customize their own motherboards, taking PC building to an entirely new level. At PC Xpress, we bring this innovative experience to you, empowering you to explore the inner workings of computers while developing valuable skills.
Why Build Your Own Motherboard?
Traditionally, motherboards come pre-assembled from manufacturers, limiting the customization you can achieve. By opting for a build your own motherboard kit, you gain complete control over your PC’s architecture. You can experiment with component layouts, explore various chipset options, and even optimize your design for specific applications such as gaming, content creation, or server setups.
Building your motherboard from scratch is more than just a hobby—it’s an educational journey. You’ll develop an in-depth understanding of electronics, circuitry, and computing hardware. For students or tech enthusiasts, this hands-on approach is invaluable in bridging theoretical knowledge with practical application.
What Comes in a Build Your Own Motherboard Kit?
Most DIY motherboard kits come with all the essential components required to assemble a fully functional board:
- PCB (Printed Circuit Board): The foundation where all components are mounted.
- Chipsets and Processors: Depending on the kit, you may receive a basic CPU and chipset to experiment with.
- Memory Slots and Storage Interfaces: Slots for RAM, SSDs, and other storage devices.
- Connectivity Ports: USB, HDMI, Ethernet, and audio ports to simulate real-world usage.
- Power Components: Capacitors, voltage regulators, and power connectors for stable operations.
- Instruction Manual or Online Guides: Step-by-step instructions, often complemented with videos for easier assembly.
With these components, you can explore how each part interacts, and even modify the motherboard design for unique projects.
The Educational Benefits of Building Your Own Motherboard
Building your own motherboard kit offers more than just a hands-on project. Here’s why it’s a valuable learning experience:
- Understanding Circuit Design: You’ll see firsthand how circuits are created and connected, giving you a practical understanding of electrical pathways.
- Problem-Solving Skills: DIY motherboard assembly encourages troubleshooting, helping you develop critical thinking skills essential for hardware engineers.
- Component Familiarity: You’ll learn to identify chips, resistors, capacitors, and other components, which is crucial for anyone looking to pursue electronics or computer engineering.
- DIY Empowerment: Completing your own motherboard gives a sense of accomplishment, boosting confidence in tackling other hardware projects.
At PC Xpress, we emphasize not only quality but also educational value, making our kits suitable for beginners and advanced users alike.
Unique Titles for Your Project
When you build your own motherboard, naming your project adds a personal touch. Here are some ideas:
- The Quantum Builder – Perfect for experimental designs with cutting-edge components.
- CircuitMaster 3000 – Ideal for showcasing engineering prowess.
- DIY ComputeCore – A simple yet elegant name for your custom motherboard.
- NeonBoard X – If your kit includes LED or RGB components for visual flair.
- FutureChip Creator – Highlighting innovation and future-ready design.
These unique titles can make your motherboard not only functional but also a centerpiece of your workspace or portfolio.
Tools Required for Assembly
Before diving into assembly, ensure you have the proper tools to make the process smooth:
- Precision Screwdrivers: For installing small screws and components.
- Soldering Kit: Some kits require light soldering for connecting specific parts.
- Multimeter: Useful for testing voltage and continuity across circuits.
- Anti-static Wrist Strap: To prevent electrostatic discharge that could damage components.
- Magnifying Glass or LED Lamp: Helpful when handling tiny circuit elements.
Having the right tools enhances your experience and ensures a successful build.
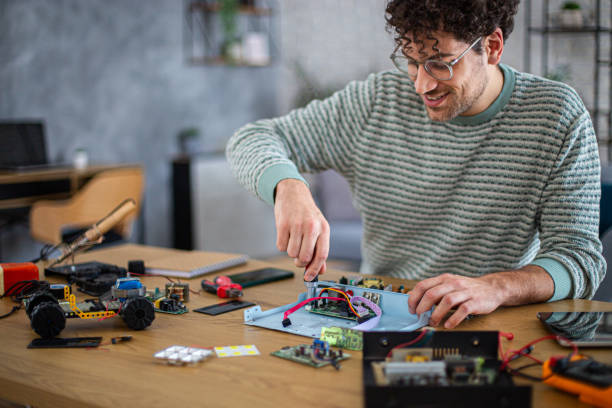
Step-by-Step Assembly Process
While each kit comes with specific instructions, the general assembly process includes:
- Preparing the PCB: Remove protective layers and inspect the board for defects.
- Installing the CPU and Chipset: Carefully insert the main processing unit and accompanying chipsets.
- Mounting Memory Slots: Attach RAM slots and ensure proper alignment.
- Adding Storage Interfaces: Connect SSD, HDD, or other storage slots as per the manual.
- Connecting Power Components: Install voltage regulators, capacitors, and power connectors.
- Installing Ports and Connectors: Attach USB, HDMI, Ethernet, and audio ports.
- Testing the Board: Power up the motherboard to ensure all components function correctly.
Following these steps allows you to gradually build your confidence while creating a functional motherboard.
Customization Options
One of the most exciting aspects of building your motherboard is customization. You can experiment with:
- Overclocking Capabilities: Test different voltage levels to optimize CPU performance.
- Form Factor Designs: Adapt the board to standard sizes like ATX or Micro-ATX.
- Aesthetic Upgrades: Add RGB lights, custom heatsinks, and personalized decals.
- Peripheral Integration: Include unique port arrangements for gaming or multimedia setups.
By customizing your motherboard, you not only improve performance but also make your project truly one-of-a-kind.
Safety Tips for Beginners
Safety is crucial when handling electronics. Keep these tips in mind:
- Always unplug components from power sources during assembly.
- Use an anti-static wrist strap to avoid damaging sensitive chips.
- Follow the kit manual meticulously to prevent incorrect connections.
- Work in a well-ventilated area if soldering is required.
- Double-check all connections before powering up the motherboard.
These precautions help ensure a safe and rewarding experience.
Why Choose PC Xpress for Your DIY Motherboard Kit
At PC Xpress, we specialize in providing high-quality DIY motherboard kits that cater to enthusiasts, students, and professionals alike. Here’s why our kits stand out:
- Comprehensive Components: Every kit comes with all essential parts and clear instructions.
- Educational Value: Designed to teach electronics, circuitry, and computer architecture in a hands-on way.
- Customizable Options: Our kits allow modifications to suit personal or professional projects.
- Expert Support: Access to guidance from our experienced team to help with troubleshooting.
Whether you are a beginner or an experienced builder, PC Xpress ensures a seamless, enjoyable DIY motherboard experience.
Final Thoughts
Building your own motherboard is more than a hobby—it’s a journey into the heart of computing. From learning about circuitry to customizing your hardware, this DIY experience equips you with skills that extend far beyond the project itself. By choosing a PC Xpress motherboard kit, you gain access to premium components, detailed guidance, and a platform for innovation.
Whether you aim to create a gaming powerhouse, an experimental computing device, or simply enjoy the thrill of building from scratch, your DIY motherboard adventure starts here. Take the leap, embrace the challenge, and unlock your inner PC engineer with PC Xpress today.