Sod Mississauga
Thinking about new sod in Mississauga? You can get a healthy, instant lawn that suits local soil and climate when you pick the right turf and installer. Choose sod matched to your yard and schedule professional installation to avoid common problems and see strong results quickly.
This post walks you through how sod installation works in Mississauga, what to expect during the job, and practical maintenance steps to keep your lawn thriving all season with Sod Mississauga services. You’ll learn how proper preparation, watering, and simple care decisions prevent failures and save time and money.
Sod Installation in Mississauga
Choose sod that matches your yard’s sun exposure, soil type, and use patterns, and plan installation during the region’s optimal planting windows. Proper site prep, correct seam alignment, and immediate watering determine how quickly the turf roots into Mississauga clay and loam soils.
Best Types of Sod for Mississauga Lawns
Mississauga’s climate favors cool-season blends. Look for sod mixes that include Kentucky bluegrass for density and recovery, perennial ryegrass for wear tolerance and quick germination, and fine fescue for shade and low-maintenance areas.
If your yard gets full sun and heavy foot traffic—play areas or pet runs—prioritize higher ryegrass content for resilience. For shaded yards under mature maples or between buildings, choose a higher fine fescue proportion to resist thinning and disease.
Check the sod’s root mass and soil-free thickness when buying. Thin, pale rolls often indicate weaker establishment. Ask suppliers about pest-free, locally grown rolls to reduce shock and transplant stress.
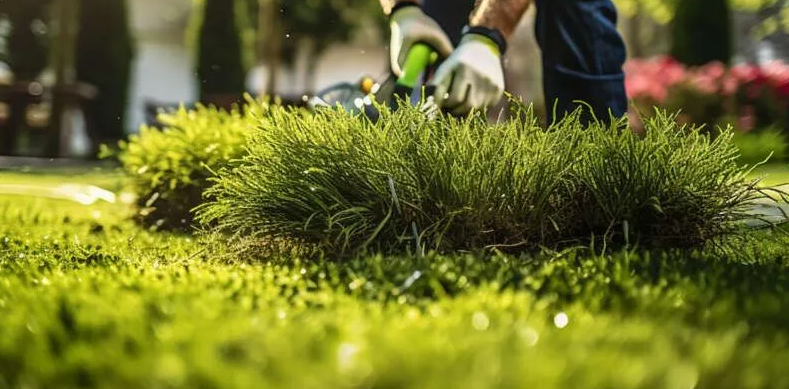
Installation Process Overview
Begin by removing existing vegetation and debris, then grade the area to ensure 1–2% slope away from foundations. Till compacted sections to a depth of 4–6 inches, incorporate 2–3 inches of screened topsoil or compost where native soil is poor, and rake to a smooth, firm surface.
Lay rolls in a staggered brick pattern, butting seams tightly without overlapping. Use a push roller or light tamp to improve soil contact, and immediately water thoroughly—approximately 0.75–1 inch—to settle roots. For larger yards, install irrigation or schedule daily watering for the first 14 days. Avoid heavy traffic for 3–4 weeks while roots establish.
Seasonal Considerations for Laying Sod
Spring (late April–June) and early fall (mid-August–October) offer the best establishment conditions: moderate temperatures, active root growth, and reliable rainfall. Avoid laying sod during July heat spikes or in frozen ground; high heat increases watering needs and transplant shock.
If you must install in summer, plan morning installation with expanded irrigation—water twice daily for the first week and monitor turf temperature. Fall installations benefit from cooler soil and longer rooting windows; mow once at a higher setting and continue watering until first hard frost. For winter planning, reserve sod orders early and schedule delivery for the next viable planting window.
Sod Maintenance and Care
Keep new sod consistently moist, feed it on a timed schedule, and inspect for pests or disease weekly. Timely watering, targeted fertilization, and early disease prevention preserve turf density and color.
Watering Guidelines
For the first two weeks after installation, water your sod 2–3 times daily to keep the top 1 inch of soil consistently moist. Use a sprinkler that delivers even coverage and run for 10–20 minutes per zone depending on water pressure; adjust so runoff doesn’t occur.
After roots establish (about 2–4 weeks), switch to deep, infrequent watering: 1–1.25 inches once or twice per week. Measure with a rain gauge or a shallow container. Water early morning (between 4–9 AM) to reduce evaporation and fungal risk.
During hot, dry spells increase frequency but keep individual applications deep. Reduce watering in cooler months and after significant rainfall. Repair dry patches immediately: loosen soil, press sod edges, and water thoroughly.
Fertilization Practices
Begin with a starter fertilizer high in phosphorus (e.g., 10-20-10) at installation or within the first week to promote root growth. Follow label rates for your sod size; overapplication burns roots and wastes money.
Apply a balanced fertilizer (such as 16-4-8 or 12-0-12) 6–8 weeks after installation. Then feed on a seasonal schedule: early spring and late summer/early fall for cool-season grasses common in Mississauga. Use slow-release nitrogen to provide steady growth and reduce mowing frequency.
Avoid high-nitrogen applications in late fall. Test your soil every 3–4 years and amend pH or nutrient deficiencies based on results. Keep fertilizer off hard surfaces and water in lightly after application to prevent burn.
Preventing Lawn Diseases
Mow at the recommended height for your grass type—usually 2.5–3.5 inches for cool-season turf—and never remove more than one-third of blade length at a time. Proper mowing reduces stress and disease susceptibility.
Ensure good air circulation and drainage; aerate compacted areas and topdress low spots to avoid standing water. Remove thatch thicker than 0.5 inches because it traps moisture and fosters pathogens.
Identify symptoms early: brown patches, concentric rings, or water-soaked blades indicate disease. Treat specific diseases with fungicides only when confirmed; follow product labels and use targeted applications rather than blanket spraying. Rotate treatments and combine cultural controls—proper watering, correct fertilizer timing, and good mowing—to minimize disease recurrence.